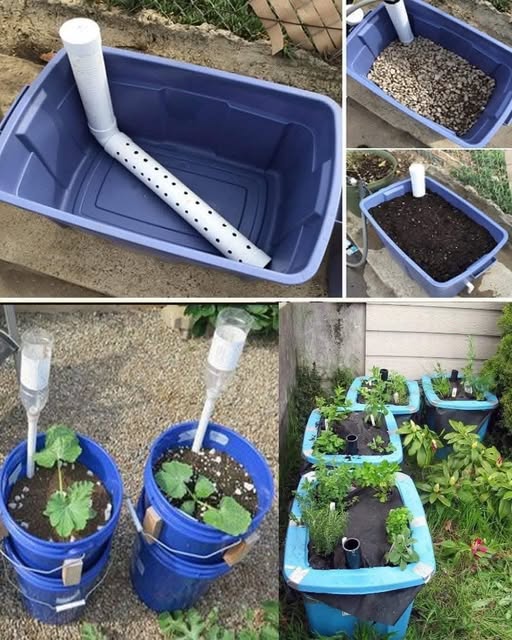
2. Wicking System Installation
- Cut PVC pipe 2 inches taller than container height
- Create small holes along the bottom 3 inches of pipe
- Cut wicking material into 12-inch strips
- Thread wicking material through PVC pipe
- Secure wicking material at top and bottom
3. Layer Assembly
- Add 2-inch layer of drainage gravel
- Position wicking system vertically
- Fill with potting soil, leaving 2 inches at top
- Compact soil gently around wicking system
4. Water Reservoir Setup
- Place reservoir container below growing container
- Fill with water until 2 inches from top
- Install water level indicator if desired
- Mark maximum water level on reservoir
5. Planting and Maintenance
- Create planting holes in soil
- Install plants, spacing appropriately
- Water thoroughly from top initially
- Monitor water level weekly
- Refill reservoir when indicator shows low
Pro Tips
- Use dark containers to prevent algae growth
- Clean system thoroughly between growing seasons
- Add liquid fertilizer to reservoir monthly
- Position in full sun for optimal growth
- Consider adding wheels for mobility
Plant Selection Guide
Best plants for self-watering containers:
- Tomatoes
- Peppers
- Herbs
- Leafy greens
- Annual flowers
This system works efficiently for both indoor and outdoor growing, providing consistent moisture for healthy plant growth while conserving water.
