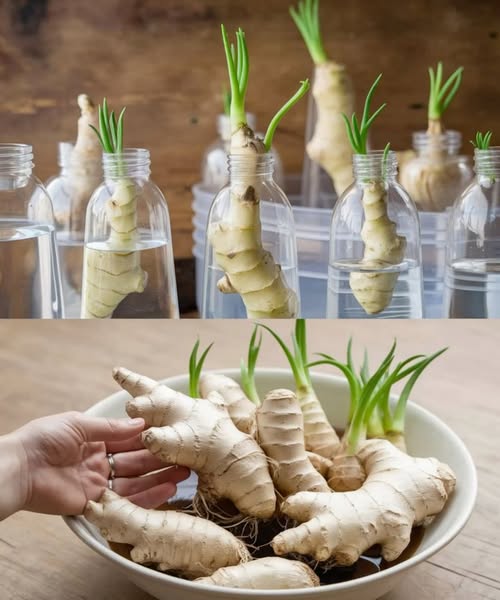
Step 2: Soak the Ginger
Before placing your ginger in water, give it a little TLC by soaking it overnight. Here’s why and how:
- Why Soak? This step rehydrates the ginger, softens its skin, and encourages sprouting by mimicking the natural conditions it would experience in the soil.
- How to Soak: Fill a bowl with clean, lukewarm water and submerge the ginger root. Leave it undisturbed for about 12 hours or overnight.
Optional: If you’re using non-organic ginger, soaking also helps to remove any chemical residues.
Step 3: Plant in Water
Once your ginger is prepped, it’s time to set it up for growth. Follow these steps to create the perfect watery home for your root:
- Choose a Container: Pick a clear glass, jar, or bowl that’s wide enough to accommodate the ginger root.
- Add Water: Fill the container with fresh, clean water. The water level should cover about half of the ginger root, leaving the eyes above the surface.
- Position the Ginger: Lay the ginger root flat in the container, ensuring that the eyes face upward. These eyes will develop into shoots, so it’s important they stay dry.
Step 4: Find the Perfect Spot
Ginger thrives in warm, sunny environments, so finding the right location is crucial. Here’s what to do:
- Light: Place the container in a spot that receives bright, indirect sunlight, like a windowsill or kitchen counter. Direct sunlight can be too harsh and may dry out the root.
- Temperature: Ginger loves warmth, so aim for a spot that stays consistently above 70°F (21°C).
- Fresh Water: Change the water every 2-3 days to keep it fresh and prevent bacterial growth. Stagnant water can cause the root to rot.
Step 5: Watch It Grow
Patience is key when growing ginger. Here’s what to expect as your ginger begins to sprout:
- Roots First: After about 1-2 weeks, you’ll start to see white roots emerging from the base of the ginger. These will grow longer and stronger over time.
- Shoots Follow: Green shoots will begin to sprout from the eyes of the ginger root. These shoots will grow taller and more vibrant as the days go by.
If your ginger doesn’t show signs of growth after a few weeks, don’t be discouraged! It might just need a little more time or a slight adjustment to its environment (e.g., more warmth or a fresher root).
Caring for Your Growing Ginger
Once your ginger has sprouted, here are a few tips to keep it healthy and thriving:
- Monitor Water Levels: Always ensure the bottom of the root is submerged in water.
- Trim Dead Parts: If any part of the ginger root starts to look mushy or discolored, carefully trim it off to prevent rot from spreading.
- Optional Transfer: If your ginger grows large enough, you can transfer it to soil for even more robust growth. Simply plant it in a pot with rich, well-draining soil and keep it in a warm, sunny spot.
Harvesting and Using Your Ginger
Growing ginger in water is not just about aesthetics; it’s also incredibly practical! Once your plant has grown for a few months, you can harvest small pieces of the root for culinary use:
- Harvest Gently: Use clean scissors or a knife to cut off a small piece of the root, leaving the rest to continue growing.
- Incorporate into Recipes: Fresh ginger adds a burst of flavor and nutrition to stir-fries, teas, smoothies, soups, and even desserts!
Why Grow Ginger in Water?
Here are some reasons why this project is worth trying:
- Sustainability: Growing ginger at home reduces your reliance on store-bought produce.
- Aesthetic Appeal: The green shoots and roots make for a beautiful, natural centerpiece in your kitchen.
- Cost-Effective: With one ginger root, you can grow a continuous supply of fresh ginger.
- Fun and Educational: This project is perfect for kids and adults alike, offering a hands-on lesson in plant growth and sustainability.
So, what are you waiting for? Grab a ginger root, a jar, and some water, and start your journey toward homegrown flavor today. Happy gardening! 🌿✨
